Century Link fiber with OpenWrt on a MikroTik Hex S (RB760iGS)
Back in 2021 I had the bright idea to try to run my network on open source software that I actually understood. I cycled through most of the free/low cost open source options including various forms of OpenWrt (Gl.inet, Cudy) and a MikroTik Hex S. I really liked the MikroTik stuff - the hardware seemed to be a pretty good value. But they run a custom linux-based OS called RouterOS that was just way, way too complicated for me to figure out. I think it’s really oriented towards enterprise IT stuff, not home use. I like OpenWrt for it’s simplicity, and actually attempted installing it onto the MikroTik, unsuccessfully. All I can remember is shelving the project at 4AM after spending all night installing Windows on my Intel MacBook to run some custom software - I don’t know. Also, it was before LLM tech made boutique hardware hacking more approachable.
I eventually settled on some off the shelf mesh wifi routers from a company that I will not name, but that was recently under fire for weak security. It just doesn’t feel great to have some strange locked down software at the front of my network. I literally have to use an app on my phone to configure it, the web software doesn’t have most settings accessible.
I keep waiting for some killer OpenWrt router to hit the market, but I think most people are not like me and are not interested in running a dedicated router without any wireless built in. I want to have a dedicated router and then the AP’s can figure out the wireless on their own. At least, that’s the plan.
Well, I’m back now, armed with the best hallucinating LLM I can find and my own neolithic intelligence, and I figured out how to run OpenWrt on this MikroTik. It was pretty tricky. The OpenWrt guide was hard for me to understand↗, so here’s a regurgitation of what I learned there. The first part is relevant to those wishing to install OpenWrt on their MikroTik Hex S. The second part is relevant to those wishing to use OpenWrt to communicate with their Century Link Fiber ONT. I don’t imagine the overlap in audience there to be very large, so skip to the section you’re interested in.
Part 1: Installing OpenWrt
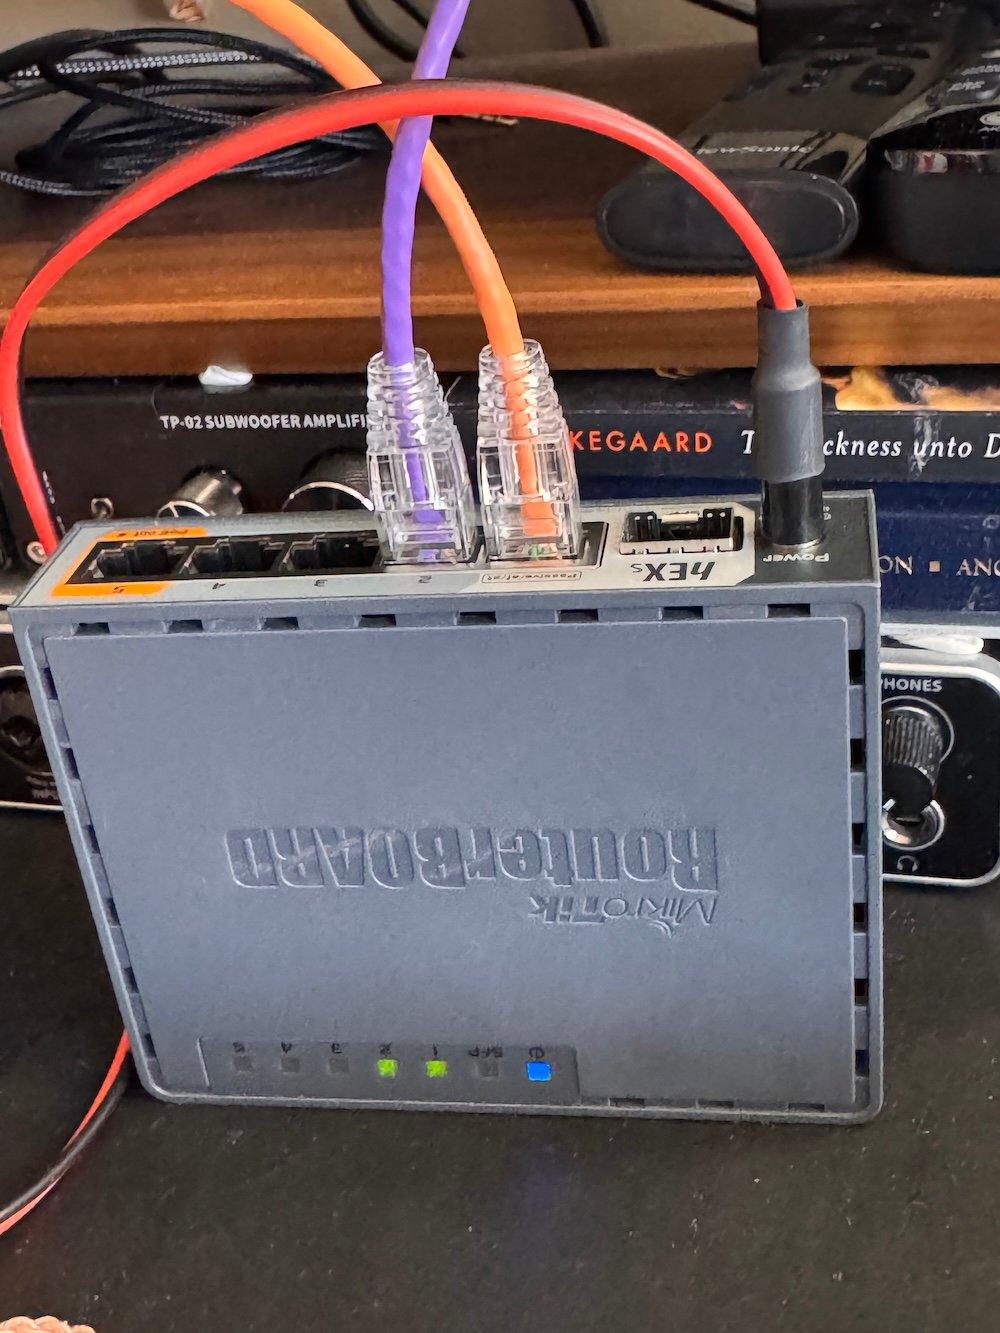
- Connect your computer to ethernet port 2 - 5 on the Hex S.
- Connect power.
- Connect to 192.168.88.1↗ in a browser and login.
- If you don’t know your credentials, remove power, hold the reset button on the side, connect power, and release the reset button when the light starts flashing. It might also make some beep sounds. After resetting, connecting to 192.168.88.1↗ should show you a page where you can set the password.
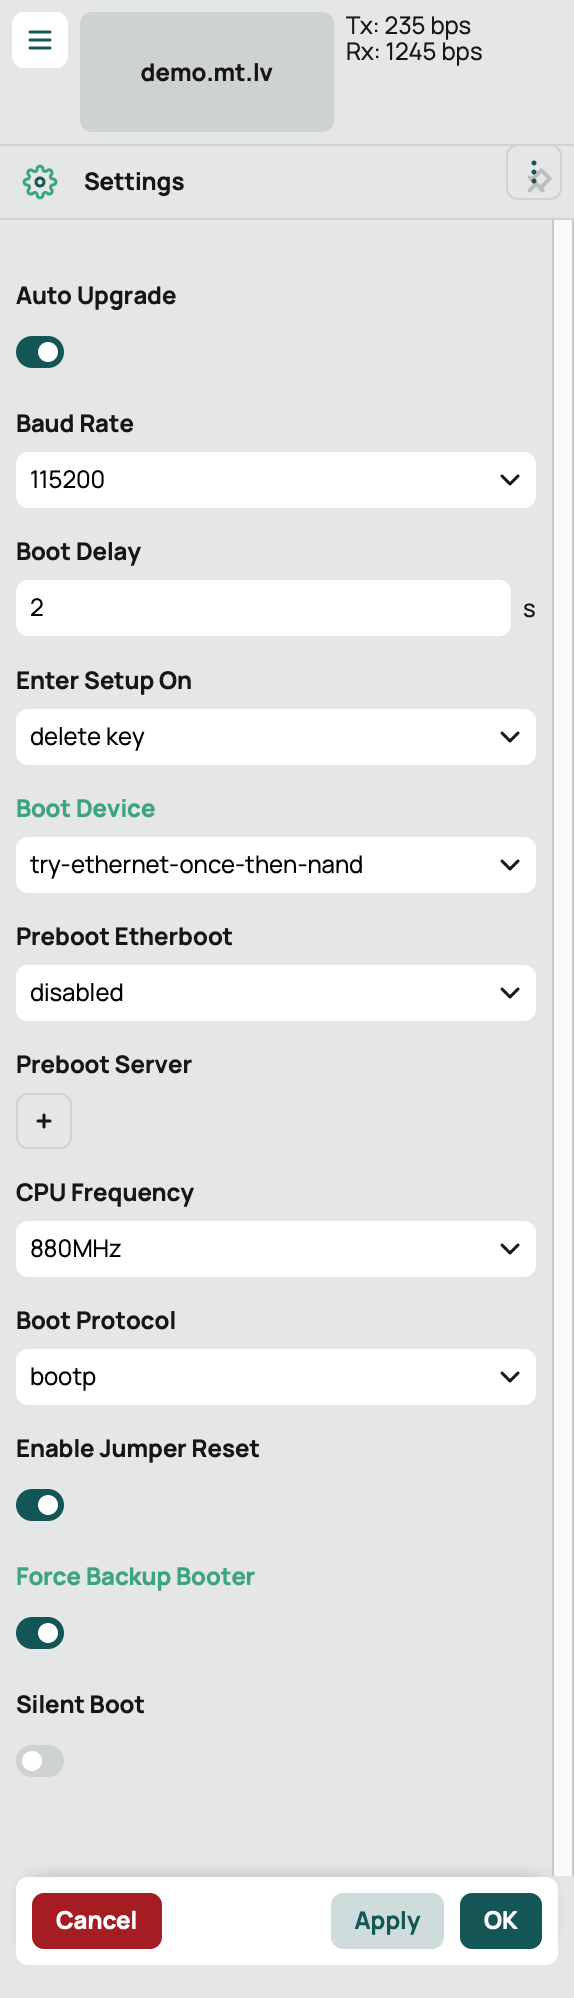
After logging in, go to the “system” section on the left nav, then click “RouterBoard”. On that page, go into the “Settings” tab. For “boot device”, select “try-ethernet-once-then-nand. “Boot protocol” is “BOOTP”. Check “Force backup booter”. Click apply.
You must manually turn off the Hex S, do not simply remove power. In the Settings left nav, click “Shutdown” and hit confirm. Just for safe measure, remove power.
Unplug the ethernet cable from the Hex S and plug into port 1 (WAN).
We’re going to run a little “tftp” server so the Hex S will grab an OpenWrt image and boot it instead of it’s flashed firmware.
You’ll need to install dnsmasq which can be done with Homebrew: brew install dnsmasq
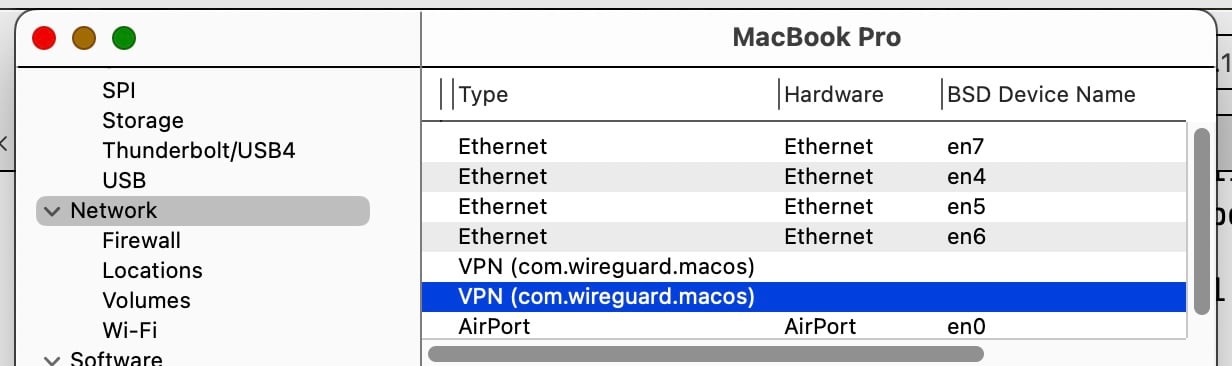
Then, save this script as “install.sh”. Don’t forget to edit IFNAME with the interface you are using. You can find the interface name in System Report on macOs and looking at the “BSD Device Name” of your network interface.
#!/bin/bash
USER=$(whoami) # Current user
IFNAME=en9     # Replace with your macOS network interface
IP=192.168.1.10

# Configure the network interface
sudo ifconfig $IFNAME $IP netmask 255.255.255.0 up

# Start dnsmasq
/opt/homebrew/sbin/dnsmasq --user=$USER \
--no-daemon \
--listen-address=$IP \
--bind-interfaces \
-p0 \
--dhcp-authoritative \
--dhcp-range=192.168.1.100,192.168.1.200 \
--bootp-dynamic \
--dhcp-boot=openwrt-23.05.0-rc3-ramips-mt7621-mikrotik_routerboard-760igs-initramfs-kernel.bin \
--log-dhcp \
--enable-tftp \
--tftp-root=$(pwd)
Download openwrt-23.05.0-rc3↗ — if you try to use the latest version, it will not boot due to too high entry point addresses↗ (no clue). Put it in the same directory as your install.sh file.
Run install.sh — I do this by running sudo bash install.sh in a terminal window.
You’ll see some output that should end in a line about “bootfile name”.
~/Desktop/hex  $ sudo bash install.sh
Password:
dnsmasq: started, version 2.90 DNS disabled
dnsmasq: compile time options: IPv6 GNU-getopt no-DBus no-UBus no-i18n no-IDN DHCP DHCPv6 no-Lua TFTP no-conntrack no-ipset no-nftset auth no-cryptohash no-DNSSEC loop-detect no-inotify dumpfile
dnsmasq-dhcp: DHCP, IP range 192.168.1.100 -- 192.168.1.200, lease time 1h
dnsmasq-tftp: TFTP root is /Users/ddegraw/Desktop/hex
dnsmasq-dhcp: 2862599112 available DHCP range: 192.168.1.100 -- 192.168.1.200
dnsmasq-dhcp: 2862599112 vendor class: MMipsBoot
dnsmasq-dhcp: 2862599112 tags: bootp, en9
dnsmasq-dhcp: 2862599112 BOOTP(en9) 192.168.1.156 dc:2c:6e:11:48:00
dnsmasq-dhcp: 2862599112 bootfile name: openwrt-23.05.0-rc3-ramips-mt7621-mikrotik_routerboard-760igs-initramfs-kernel.bin
~/Desktop/hex  $ sudo bash install.sh
Password:
dnsmasq: started, version 2.90 DNS disabled
dnsmasq: compile time options: IPv6 GNU-getopt no-DBus no-UBus no-i18n no-IDN DHCP DHCPv6 no-Lua TFTP no-conntrack no-ipset no-nftset auth no-cryptohash no-DNSSEC loop-detect no-inotify dumpfile
dnsmasq-dhcp: DHCP, IP range 192.168.1.100 -- 192.168.1.200, lease time 1h
dnsmasq-tftp: TFTP root is /Users/ddegraw/Desktop/hex
dnsmasq-dhcp: 2862599112 available DHCP range: 192.168.1.100 -- 192.168.1.200
dnsmasq-dhcp: 2862599112 vendor class: MMipsBoot
dnsmasq-dhcp: 2862599112 tags: bootp, en9
dnsmasq-dhcp: 2862599112 BOOTP(en9) 192.168.1.156 dc:2c:6e:11:48:00
dnsmasq-dhcp: 2862599112 bootfile name: openwrt-23.05.0-rc3-ramips-mt7621-mikrotik_routerboard-760igs-initramfs-kernel.bin- With the ethernet cable still connected from your computer to the Hex S’s Port 1 (WAN), connect the power to the Hex S.
- You should see output in your terminal indicating that it’s sending data to the Hex S, ending in a line that says
sent [file] to [ip]. - After the file has been sent, you can ctrl-c to kill the tftp server.
- The MikroTik will reboot itself (and it might beep at you).
dnsmasq-dhcp: 2862599112 next server: 192.168.1.10
dnsmasq-dhcp: 2862599112 sent size:  4 option:  1 netmask  255.255.255.0
dnsmasq-dhcp: 2862599112 sent size:  4 option: 28 broadcast  192.168.1.255
dnsmasq-dhcp: 2862599112 sent size:  4 option:  3 router  192.168.1.10
dnsmasq-tftp: sent /Users/ddegraw/Desktop/hex/openwrt-23.05.0-rc3-ramips-mt7621-mikrotik_routerboard-760igs-initramfs-kernel.bin to 192.168.1.156
At this point, your Hex S should be booted into OpenWrt. The easiest way to verify this is to connect your ethernet cable back to ports 2-5 and verify that DHCP is assigning an IP to your computer and that the router is 192.168.1.1. At this point, you can navigate to 192.168.1.1↗ in your browser and login with the default “root” with no password (auto populated).
In my case, it would simply reboot back into RouterOS because I was trying to use the latest version of OpenWrt in the tftp step instead of the older RC3 build, so if you are seeing that then go back and make sure you’re not trying to use the latest release unless you know for sure that it’s compatible.
“But I don’t wanna run an old release candidate build on my network!” you may say. Good news, you don’t! We’ve simply booted into OpenWrt, but it’s not actually written to flash yet. We’re essentially in a “live” environment, only modifying RAM so far.
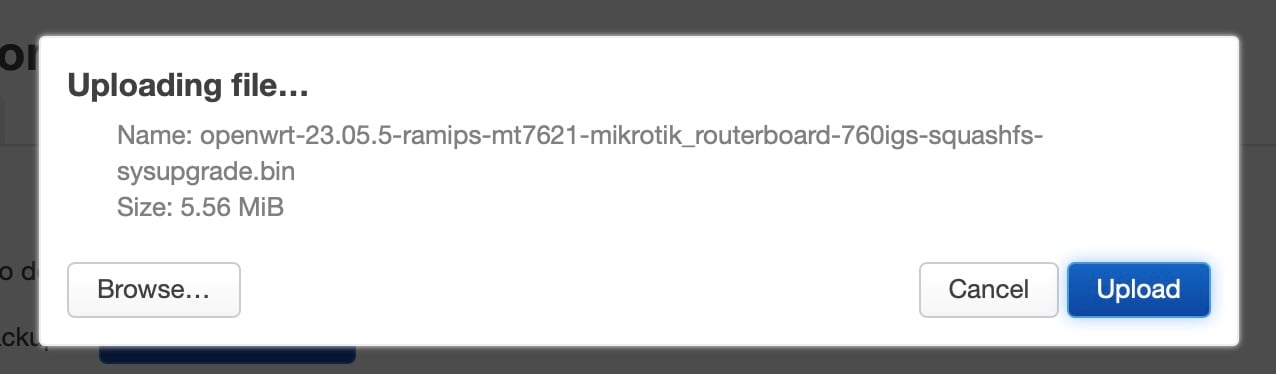
To actually install OpenWrt, navigate from the top bar to System -> Backup/Flash Firmware. From this page, at the bottom in the “Flash new firmware image” section, click “Flash image…”. Download the latest Supported Current ‘Sysupgrade image’ from the Hex S wiki page.↗ At the time of writing it’s 23.05.5. Select the sysupgrade.bin you just downloaded and then click “Upload”. It will take a few minutes to upload, flash and reboot so just hold your horses for a little bit. Once all that happens (again, the router may beep at you during this process), it will reboot into OpenWrt but this time - for real.
By default, OpenWrt will configure the WAN to use DHCP, so you can go ahead and plug the WAN port into your existing router/network connection. Now, my computer has an internet connection but is still being routed by the mikrotik so I can configure it without pulling my entire network down (hey - asking a 9 year old to pause Fortnite is like asking a C-suite to hold their zoom call while you reboot the network).
I went ahead and updated my packages one by one by going to “System” -> “Software”, then the “Updates” tab. Yes I clicked update one by one, I guess this is how you’re supposed to do it.
You can also play around with (or disable) SSH access in the System - Administration menu. I uploaded my id.pub (from ~/.ssh/) here and disabled password auth. I also changed the local domain in Network -> DHCP and DNS from “lan” to “local” because that’s how macOS does local network hostnames out of the box, and I like that. Make sure to hit “save & apply”.
Now, just ssh [email protected] and you should be greeted with some incredible ASCII art:
BusyBox v1.36.1 (2024-09-23 12:34:46 UTC) built-in shell (ash)

  _______                     ________        __
 |       |.-----.-----.-----.|  |  |  |.----.|  |_
 |   -   ||  _  |  -__|     ||  |  |  ||   _||   _|
 |_______||   __|_____|__|__||________||__|  |____|
          |__| W I R E L E S S   F R E E D O M
 -----------------------------------------------------
 OpenWrt 23.05.5, r24106-10cc5fcd00
 -----------------------------------------------------
Some useful commands:
opkg update- update package source lists (same as brew update, apt update, etc)opkg list-upgradable- find out which packages need to be updatedopkg install <pkg>- install software, such asnanoorluci-theme-openwrtopkg upgrade <pkg>- upgrade, one at a time…

At this point, I have a usable OpenWrt installation running on my MikroTik RouterBoard Hex S (RB760iGS) - but I’m not done yet. I intend to replace my current router with this router, so I’ll need to actually configure the WAN to talk to my Century Link ONT. This part was also extremely tricky to figure out and I’m still holding my breath a little bit that it’s stable.
Part 2: Century Link 201 Vlan Tagging
As of the time of writing, Lumen, the parent company of both Century Link (formerly Qwest), and Quantum Fiber, is in the process of transitioning my area in Southern Utah from the Century Link fiber service to Quantum Fiber service. As far as I understand, they are functionally identical but have slight variations in the infrastructure and equipment choices. This all makes it very confusing to try to find current information on how exactly to get your router to talk with your Century Link ONT. I’ve had good success doing this with brand name routers as well as pfSense and now OpenWrt.
The first step, and likely hardest, is to get your PPPoE username and password. There are some ways to get this, but the most reliable is to chat with support. You may be able to log into your existing Century Link router and get it from there. Without your PPPoE credentials, we can’t do anything.
Now that you have credentials, lets set up a VLAN to do some “201 tagging” (no clue, this is just how Century Link needs it). Navigate to Network -> Interfaces and then the Devices tab. Click “Add device configuration…”
Configure the device like so:
- Device type = VLAN (802.1q)
- Base device = wan (I did not use the bridged WAN + SFP device that was configured by default for my specific MikroTik router, but it might work as well)
- VLAN ID = 201
- Device name = wan.201
- Enable IPv6 = disabled (AFAIK, Century Link does not offer IPv6 beyond some “6rd trunking” that is actually just IPv4 in a less efficient disguise)

Hit Save & apply, then head back to the Interfaces tab. Click “Edit” on your WAN device and configure like so:
- Protocol = PPPoE
- Device = wan.201 (the device we just configured to do the VLAN tagging)
- PAP/CHAP username = your PPPoE username, in my case an email ending in “qwest.net”
- PAP/CHAP password = your PPPoE password, in my case too few random characters
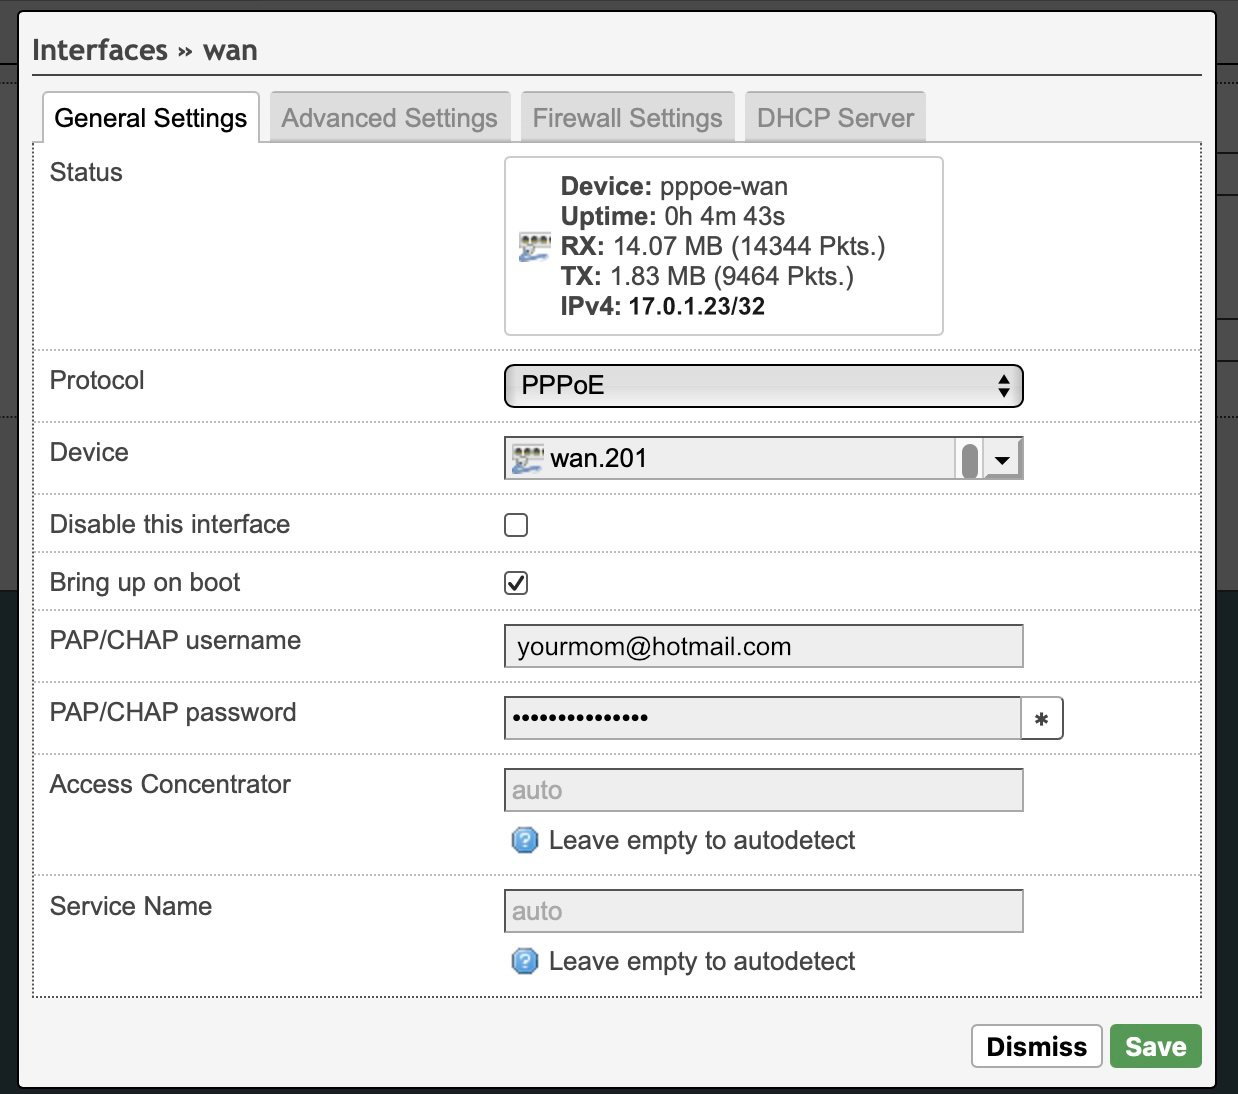
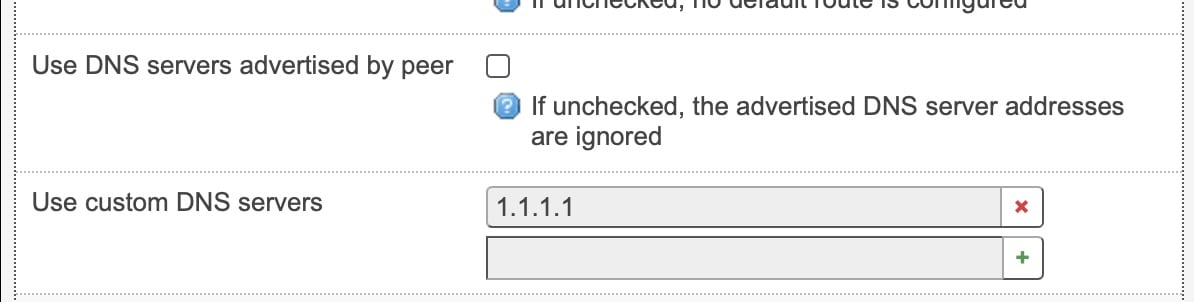
If you want to use custom DNS, and you should use custom DNS, then don’t hit “save” quite yet.
In my research, there seems to be a few way to do “custom DNS” in OpenWrt. We could configure our LAN to advertise custom DNS servers via DHCP and then clients can decide whether to use those DNS servers or not. Or, we can route DNS to the router itself and tell the router to use our custom DNS servers. I went with this approach as it seems to be the most reliable way to seamlessly give your entire network custom DNS. I’m also not going to go into more advanced DNS configuration, as I haven’t yet done it, but I’m looking at this page↗ and it seems pretty approachable.
Click the “Advanced Settings” of the wan interface and look at the option “Use DNS servers advertised by peer” and uncheck it. This opens up a new option just below for “Use custom DNS servers”. Put your DNS server IPs here one by one.
Now save, and then Save & apply. You can restart the wan interface and see if it connects. In my case, it initially starts with an error message, which is then resolved on it’s own and an IP is assigned.

If all went well, you should now be fully connected to the internet through Century Link’s ONT. Verify that your DNS settings are working, I use NextDNS so their dashboard is helpful to me. One helpful step for me when debugging if I had my PPPoE credentials correct (my notes are messy)
After you have verified everything works how you’d like it, create a backup of your config by going to System -> Backup / Flash Firmware and click “Generate archive” in the Backup section. Save it somewhere you will look for it at 2 o’clock in the morning when you’re frantically trying to figure out some issue.
Conclusion
So far, I’m happy with my setup. I feel much better about my home network knowing that it’s running on open source software that I fully configured. There’s no smoke or mirrors. Eventually I’d like to get some decent AP’s and move everything to a multi-AP/mesh OpenWrt stack. For now, I’m happy running my unnamed mesh routers in AP-only mode, and they seem to be surprisingly happy about it as well.
If you found this useful, leave a Reply or a Like. I probably can’t help you debug your specific setup, but I’m happy to answer follow-up questions, and others might have similar issues you do.
Update -
I’ve been running this for about a week now and it’s great. I streamed setting up dns-over-https with NextDNS if you’re interested in following along.