Using a GameCube controller on macOS (with rumble!)
TL;DR:
I made a GameCube to USB controller adapter that works on macOS including rumble. You can build your own.
Intro
Because I’ve had to move like 15 times in my life, I have a strong fear of owning too much crap. In times past, I had a fairly extensive game collection, but it’s been heavily pared down to just Switch, (3)DS, my childhood Xbox and GameCube games, and some random Game Boy and other retro console games that are physically odd or unique in some way such as the Satellaview cartridge and Japanese Tomagotchi games.
Here’s a video where I talk about some of the random stuff in my collection:
However, one item I still keep on hand is controllers. Authentic input methods really capture the experience of playing the games for me. I can’t quite capture the feeling of kneeling at the family room CRT, but I can capture the feeling of holding an N64 controller while I smash Beetle Adventure Racing.
The Retro Gaming Nook
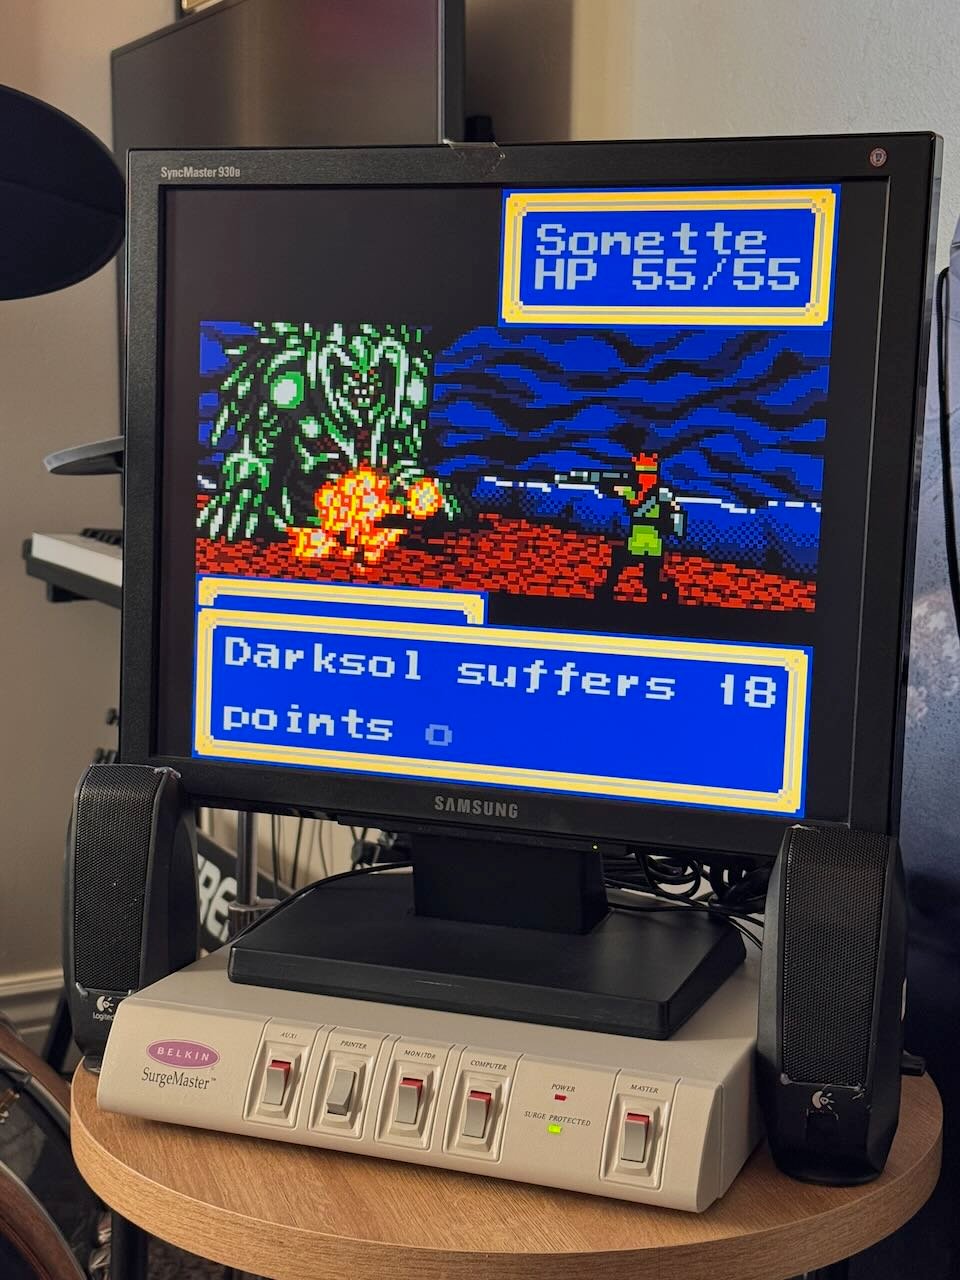
Because I work from home, I’m at my computer desk all day. When I want to play a game after work, I want to sit anywhere else. I also have a bunch of kids and generally try to make myself extremely available to them for any whim or need, but sometimes Dad just needs a few minutes to himself where he’s not working, you know? A few years ago I assembled a pretty sweet little “retro gaming nook” in my office with a super comfy recliner. I traded my friend Jared an extra Analogue Pocket for his M1 Mac Mini. I thrifted a 19” Samsung SyncMaster 930B 4:3 LCD monitor for $15, some Logitech speakers for $5, and a new-in-box Belkin SurgeMaster power center power strip/monitor stand thing for $10. I like the SurgeMaster because it’s beige and has physical switches on the front to turn on and off the monitor, speakers, and computer. The SyncMaster has VESA mounting holes on the back, so I bought a Mac Mini VESA mounting bracket and stuck it on the back of the monitor, out of sight. I also got a nice USB-C to DVI cable made by “Benfei” which both works and looks excellent at the SyncMaster’s 1280x1024 native resolution. I especially love that it does 75Hz refresh rate, which just feels like I’m a pro gamer as opposed to the now-standard 60Hz. For input I use the legendary Logitech K400 Wireless Touch Keyboard, or I just connect to the mini over remote desktop on my MacBook. It works great because the mini isn’t ever used for normal computer things, the only time it’s not playing a game is when I’m installing or configuring a game. When I’m done playing, I just flip the switches on the SurgeMaster to turn off the monitor and speakers but leave the computer running so I can easily pick back up where I left off. It’s a bit wild to me how much use I’ve gotten out of this small setup and how authentic the whole experience feels.
Due to this setup and my desire to use authentic inputs with it, I have two main constraints: First, figuring out a way to get the random old controllers working on my computer to play my freshly dumped backups. Second, the fact that I only own computers with macOS. You wouldn’t think macOS would be so limiting when it comes to controllers, but Apple seems to like to totally reinvent the wheel every 5 years when it comes to how they deal with drivers, so most of the commercially available products simply don’t work on macOS. Theoretically my life would be easier if I used some form of SteamOS or Windows, but in practice I’m just a lot more comfortable with macOS, even with its limitations.
Input Methods
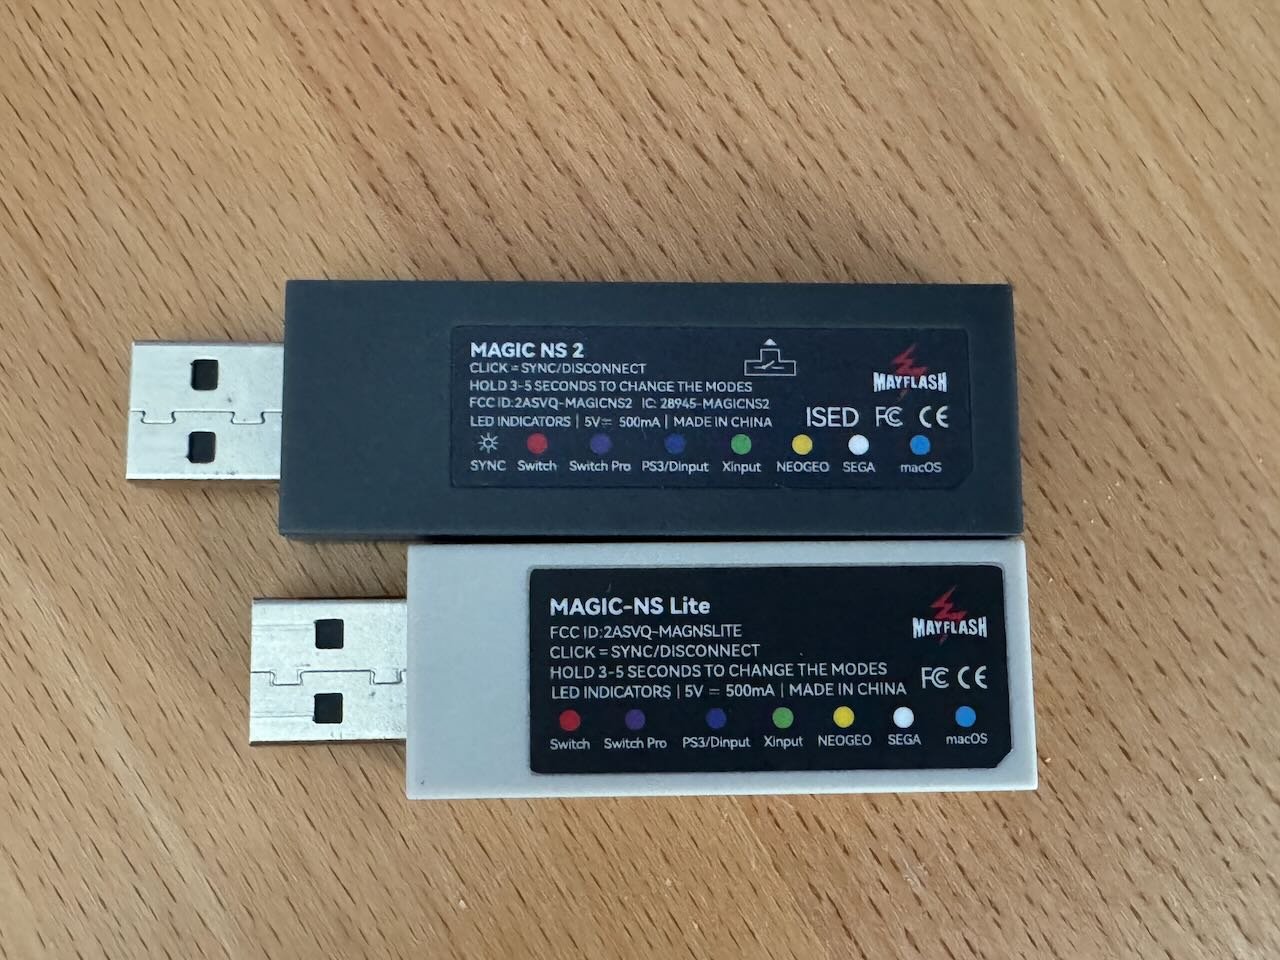
For most wireless controllers, I like to use the Mayflash USB adapters. They have a bunch, with very similar names and features and I’m not really sure what the differences are. Specifically I own the “Magic-NS Lite” and the “Magic NS 2”. The only reason I bought the “NS 2” is because it supports the DualShock 3. As far as I understand it, these adapters have a built in Bluetooth receiver that pairs directly to the controller, and then on the USB side the host system sees whichever controller you have the adapter set to. For example, if you set the adapter to “Switch Pro”, you can pair a Sony DualSense to it, plug it into your Switch, and the console just sees a Switch Pro controller connected over USB. I prefer using these adapters for wireless controllers even if macOS can pair to the controller directly because I feel like there’s less latency. It seems like for some reason, controllers over Bluetooth natively on macOS have pretty bad latency. These adapters solve that problem completely.
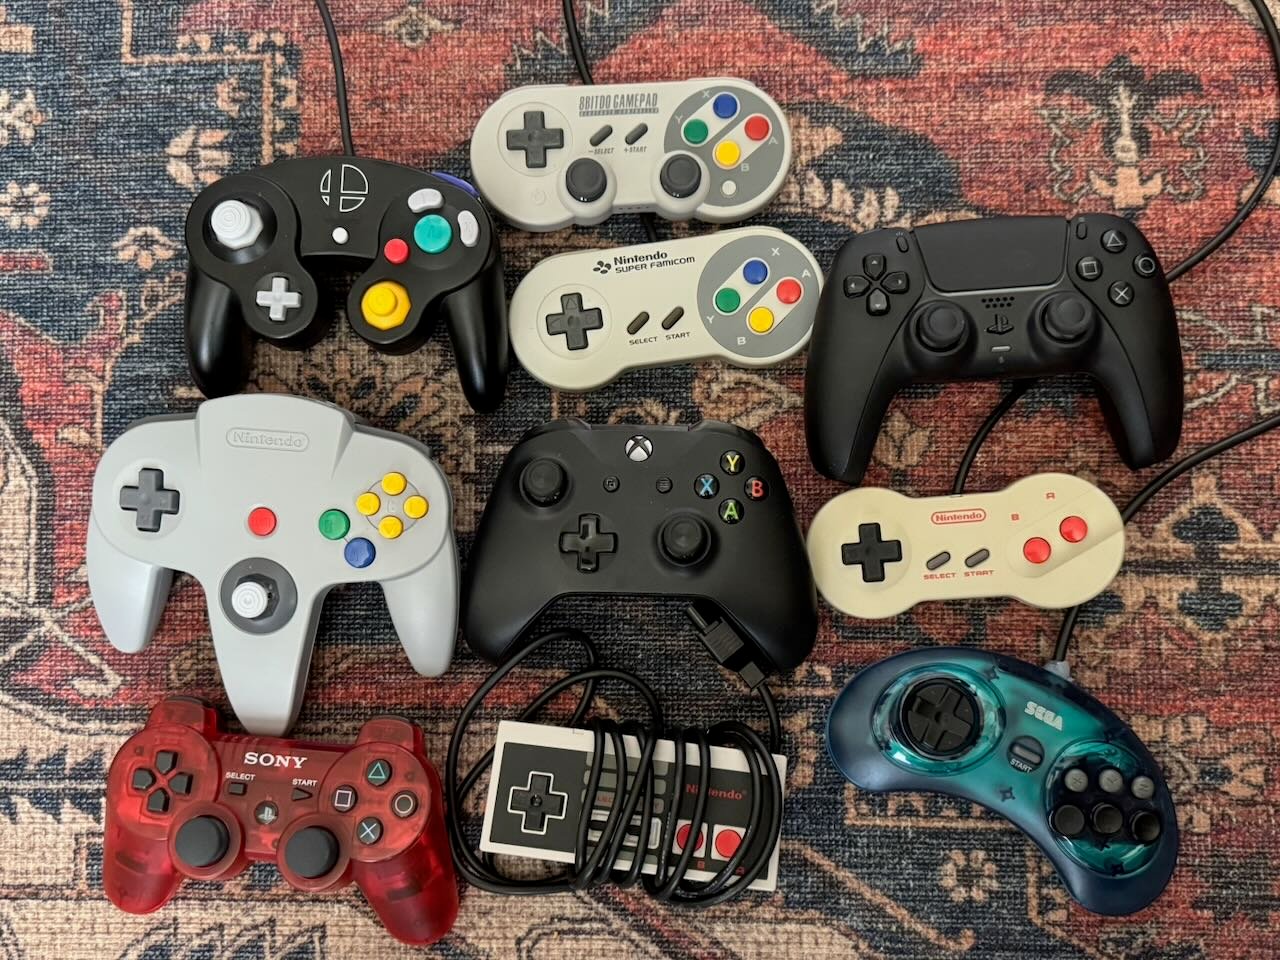
For PlayStation stuff, the DualSense (PS5) controller essentially has first party support on Apple platforms - they even sell it in the Apple Store. Since Sony hasn’t updated the button layout since the first DualShock came out in 1997, the DualSense works for anything PlayStation. It also works very well for Apple Arcade games and other official Apple Store games such as Death Stranding on macOS, iOS, and Apple TV. I do keep a DualShock 3 and a PSOne DualShock around.
For Genesis, I have one of the officially licensed Retro-Bit controllers which feels great. I got it back in the Catskull Electronics days when I was doing a lot of benchtop Genesis testing, so I shortened the cord on it from 10 feet to like 3. To get it connected over USB, I found an Arduino sketch I flashed to a Pro Micro (Leonardo) and wired and taped up a DB9 connector. I had both on hand, and it works great for what I need.
For NES and Game Boy (when I’m not playing on my Analogue Pocket), I have an A/V Famicom “dogbone” controller which is almost exactly the same as the controller that came with the top loader NES here in the US, but it has a way shorter cable. I also have an original NES controller for when I want to punish my hands. At some point I ended up with a controller port out of a broken NES, so I wired that up to an Arduino Pro Micro as well and it works great.
For Super Nintendo, I have a Super Famicom controller. Like the A/V Famicom controller, it’s about identical to the US SNES controller but the cord is shorter and the buttons are colored and not purple. I have an RP2040-zero board running GP2040-CE’s SNES Input add-on. I didn’t have a female controller port on hand, so I just stuck some wires into the controller connector and into a breadboard the RP2040-zero sits on. I should probably fix it. I also have an 8BitDo SF30 Pro that I use quite often with basically everything. I like having a couple of extra buttons available to map to save states and fast forward which is how I personally enjoy unforgiving retro games when I don’t have the time to deal with evil random number generators and overall just kind of suck at video games in general. I’ve owned it for the better part of 10 years and I’ve gotten a ton of use out of it.
For Dreamcast and Xbox, I actually prefer to play on original hardware. I think there’s a 3-way tie for my favorite console between those two and the Nintendo DS. I have a custom Dreamcast I tried to make look like an OG Xbox with a black shell and a green power LED. Since the Dreamcast can do VGA output natively, I connect it directly to the monitor and speakers. I also built a “USB4MAPLE” adapter which allows me to use my Mayflash adapters on real Dreamcast hardware. During the pandemic I fully recapped an OG Xbox, installed a modchip and hard drive, and a sweet HDMI output mod so it actually stays connected to our main living room TV since my kids like to play it. On the odd chance I emulate either of them, I have an Xbox One Bluetooth controller that seems to work great on macOS. The Xbox controller also works very well for various Steam games on macOS.
For DS/3DS I play on original hardware. For GB/GBA I usually play on my Analogue Pocket, but sometimes I’ll use my retro gaming nook with the SF30 Pro. For Switch, I actually have an OLED Switch and sometimes play it docked to the family TV, but it’s been mostly commandeered by my kids, so I’ll usually play with my Switch Lite since I can keep it clean and nice. I have an ergonomic grip for it which I prefer to playing with joycons which are just too thin for me to use comfortably. I did buy a CRKD Nitro Deck but the rumble is actually hilariously bad and overall the product just feels cheap. For my kids, it’s a miracle since it projects the ports and offers a lot of protection over the raw switch + joycons. Man, those joycons are really not designed to hold up against kids. Even if you don’t abuse them, I think all 4 of ours have pretty bad stick drift.
For Nintendo 64, which has a very very unique and difficult to fully replicate controller, I use the official Nintendo Switch Online controller. It’s great. Built in rumble, fixed joystick, and it pairs perfectly with macOS. I just wish they’d come out with some funtastic color variants!
That just leaves one key console that has potentially the most iconic controller of all time, one that is still sought after, modded, and used by casual and esports players alike. Of course I’m talking about the Nintendo GameCube controller.
Options for using a GameCube controller on macOS in 2026
There are a lot of options for using a GameCube controller on modern platforms in 2026. Very few of them work at all on macOS, and the ones that do don’t work very well.
Probably the single most attractive option at this point is the Nintendo Switch Online GameCube Controller. It seems to be essentially perfect. However, unlike the Nintendo 64 controller, it cannot be paired or used with macOS out of the box. There’s a python based pairing app but it doesn’t support rumble, which is of vital importance to me when using authentic inputs. Another application seems to support rumble on macOS, but it also looks a bit hacky to get working. I concluded that for me right now, the official Switch GameCube controller isn’t an option. I’m tempted to order one just to have on hand, but I’m frugal and $70 for a paperweight just cannot be justified. I actually emailed Mayflash support asking if they might add support for this with their adapters but they replied that their R&D team was preoccupied with other projects.
I thought about just going for original hardware. I still have my childhood GameCube with the Digital A/V port. I used to have a Carby HDMI adapter but my kids broke it, and even still I’d have to use some kind of HDMI to DVI adapter to get it working with my retro gaming nook. I also have a Wii with GameCube controller ports, but the story there is the same as the GameCube.
While I have quite a few GameCube controllers in various stages of decay due to years of use and abuse, a few years ago I had the incredible foresight to pick up a pair of the rereleased controllers Nintendo made for Smash Ultimate. They’re identical to the original but the cable is 3 meters instead of the original’s 2 meters. These were used a bit by me and my kids with our GameCube before the Carby was broken, so they’re still in like new condition.
But how to get an original GameCube controller to talk to macOS?
8BitDo actually sells a “mod kit” for the controller. It’s only available through their official store. At $26.98 shipped, it’s not a bad price really. My complaint is that it fully replaces the guts of the controller including the thumbsticks. It also doesn’t support the analog R/L trigger inputs, which isn’t absolutely essential to me, but if I’m jumping through this many hoops to use an official controller, it feels like a compromise not worth making. At that point, I feel I’d be better off just using one of the third party controllers that might already support macOS. Not to mention, the battery is charged with a special cable which like, I do not want to have to keep around for the rest of my life. The 8BitDo product page also only lists support as “Switch, Android” so it might not work on macOS at all anyways!
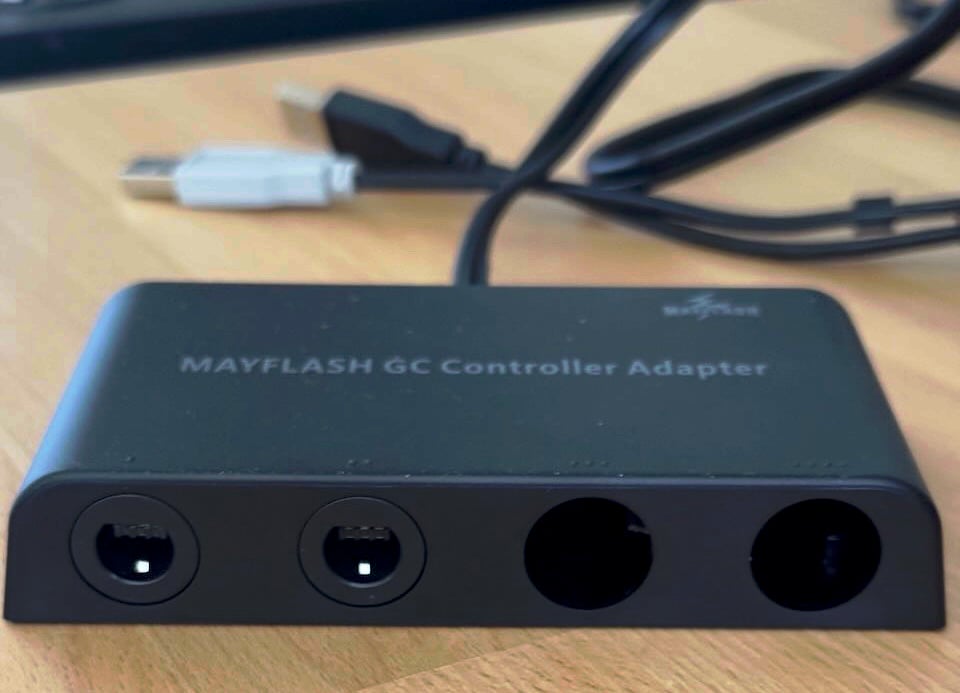
The obvious choice would be the official Nintendo USB adapter. However, that’s out of production, very expensive, and still doesn’t work on macOS! There are a lot of third party adapters which appear to be fully functional clones of the official adapter but still have the same limitation that they do not work with macOS. The most popular option is a clone produced by Mayflash known as the “Mayflash 4-port GameCube adapter” (model number W012). This has a switch on it to select between Switch and PC mode. I read reports that the PC mode would work on my Mac, so I ordered one from Amazon for $18.99.
The day it arrived I locked myself in my office to quickly attempt using it. At first, it seemed like it would work! PC mode showed up on Mac and I was able to map buttons. But no matter what I did, I couldn’t get rumble to work. At this point my kids were about to break the door down, so I had to take a break. The next day, I resumed testing. The Dolphin docs say to use an app called “GCAdapterDriver”. It’s an app that runs on macOS that supposedly allows the official (and official-compatible) GameCube adapters to work. However, for the life of me, I couldn’t get it to do a single thing. Fortunately the application is open source, but it hasn’t seen an update in 5 years so I assume that something Apple changed in macOS since then broke it. Even on top of all of this, I couldn’t find any definitive source that said rumble would work.
I turned back to the Mayflash adapter, wondering if possibly a firmware update might make it work on macOS with rumble. Mayflash’s support pages are almost offensively vague, but they have a page for a firmware update for both Windows and macOS. The single mac version says it’s version “V1.04”, while the latest windows version says it’s “V10”. Both have identical notes which say “Compatible with MacOS (must update it on Windows ,however).” The macOS driver is distributed in an unsigned PKG which doesn’t feel great. Even after accepting the macOS gatekeeper warnings, it requires Rosetta 2 to run, at which point I nope’d out. Once installed, Rosetta 2 is very hard to uninstall and at this point it’s going to be discontinued next year. I tried to set up a Windows virtual machine but after letting it cook for several hours, nothing was working. Again, I didn’t even have a promise of rumble working at all even if I did eventually get the firmware update to work.
At this point, I was ready to give up and write it off as “not possible” until maybe the official Switch ‘Cube controller was supported by Mayflash or possibly macOS. Being a frugal cheapskate, I also already own all the hardware, including a $20 adapter that was now essentially e-waste to me.
However, like the legend of the Phoenix, I rose from the ashes. I refused to give up.
The Solution
One thing I learned from some of the past controller adapter projects I’ve done is that the Raspberry Pi Pico’s RP2040 is potentially the single best piece of silicon produced in the last decade, save possibly Apple’s own M-series chips. Unlike the other Raspberry Pi Single-Board Computers that run a full OS like Linux, the RP2040 is a microcontroller, like the ATMega328 of Arduino fame. You compile and flash firmware onto the chip to do one specific thing. The 2040 has some really incredible features that allow it to do native USB stuff very well. Potentially the best feature is its “programmable I/O” (PIO) that give it almost-FPGA like abilities to emulate hardware protocols that a standard microcontroller wouldn’t be able to do. A full Pi Pico dev board is $5, and the chip on its own is well under a dollar. My favorite RP2040 dev board is the “RP2040-Zero” which is tiny, has USB-C, and is $10 for a 3-pack on Amazon. I picked up a 3-pack a few years ago for my other controller projects, and wouldn’t you know it, I still had one more waiting for me to use.
Some basic googling turned up a project on GitHub called “libjoybus”. From the readme, it describes itself as “An implementation of the Joybus protocol used by N64 and GameCube controllers, for 32-bit microcontrollers.” Apparently, it spun off another project “WavePhoenix”, which recreated the receiver for the GameCube WaveBird wireless controller. libjoybus can do both host and target operations. You can use it to build your own Joybus controllers from scratch (send inputs into a real console), or use it to build things you can plug original controllers and accessories into. It’s the host mode I want to use.
There are some excellent example projects using the RP2040. Most notable is one that fully implements the official USB GameCube controller adapter (the thing my useless Mayflash thing is). And, more important for me, is one that implements a single port GameCube to USB HID adapter. From Wikipedia:
The USB human interface device class (USB HID class) is a part of the USB specification for computer peripherals: it specifies a device class (a type of computer hardware) for human interface devices such as keyboards, mice, touchscreen, touchpad, game controllers and alphanumeric display devices.
Put simply, if a device supports USB HID, then no driver is needed on anything that supports the HID protocol, which in 2026, is virtually everything with a USB port including macOS, Windows, and Linux.
An example project that allows me to flash a RP2040 board I already own and finally use my GameCube controller on macOS felt too good to be true!
Well, it was about 90% of the way there, but unfortunately, not 100%. The issue, I learned, is that USB HID doesn’t support haptic feedback, or rumble, without an additional driver. This is probably why none of the other GameCube adapters I searched for supported rumble. The GCAdapterDriver attempted to implement a custom macOS driver using macOS APIs to support the custom Nintendo peripheral, but as I found, it didn’t work for me.
So the question became “What controllers does macOS support natively that have rumble?” One of the curious things about the Mayflash wireless adapters is that they have a “macOS” mode. When the adapter is in this mode, the computer sees that a Sony DualShock 4 (PS4) controller is plugged in. From experience, I knew that this controller had native macOS support and also supported rumble. So my task became clear: I needed to get the libjoybus example to pretend to be a PS4 controller instead of a USB HID device.
From years of experience, I know enough about how USB works to know that the USB governing body (the USB Implementers Forum) charges a license fee to companies who want to use USB and assigns them a “USB Vendor ID”. It’s very expensive, and I’m not sure if the price is even publicly known. From there, the vendor can build products at will and specify their own “Product ID”. Think of it like a domain name. I can buy the “catskull” domain from whoever manages the .net top level domain. From there, I can assign my own subdomain like “buttons.catskull.net”. However, unlike domains, there’s nothing in the USB spec to verify a device that claims to be a Sony DualShock 4 controller actually is a Sony DualShock 4 controller. A device manufacturer would need to implement their own authentication if they were worried about devices masquerading as their own. In fact, back in 2014, FTDI rolled out a driver update that bricked clone chips that were using their Vendor and Product IDs without permission. It was a fiasco.1
Also from years of experience, I know that I have no idea how these USB VID/PIDs are implemented. It mostly depends on the microcontroller. For example, I know that the ATMega32u4 used in the Arduino Pro Micro (Leonardo) supports custom USB VID/PIDs, and that the VID/PID that Arduino specifies when compiling the firmware are built into the IDE and, at least as far as I remember off the top of my head, cannot be manually specified, unless you are god-tier and know how to set up a custom board definition which I may or may not have done. Unlike the Teensy 2.0, which also used the ATMega32u4 but did allow you to specify the VID/PID. I don’t actually have enough experience with the RP2040 to understand how the VID/PID stuff works there, but it appears that we have full control over them. This is very useful to us, as we want to pretend to be a DualShock 4 controller so macOS knows what to do when we plug our adapter in. This is also how the existing libjoybus example can easily pretend to be the official Nintendo GameCube adapter since the VID/PID is known and the Switch will happily accept anything with those IDs.
So, with the knowledge that macOS has a built in driver for the DualShock 4 which supports rumble, and that the RP2040 can do whatever USB stuff it wants, I set up my USB sniffer, ordered a DS4 off eBay, and spent the next 4 weeks reverse engineering the USB protocol. Just kidding! I cloned the libjoybus repo, pointed Claude Code at the USB HID example, and asked it to make it pretend to be a DS4 instead of a generic USB HID gamepad. Twenty minutes later, it had some code ready for testing. “Holy crap, is this actually going to work?” I asked myself. How could this take less time than setting up a Windows VM? Thanks to a lot of hard work from the libjoybus developer, GP2040-CE, and a little bit from Claude, that’s how. Now the fun part - I needed to actually build the thing.
I could have simply cut the end off the GameCube controller and wired it directly into the RP2040-zero, but that is extremely lame. I do not condone destroying hardware no longer in production when things that are still being produced could suffice. I’d usually grab a controller extension cable since they’re cheap and plentiful, or even a raw female controller socket since apparently those are still being made as well, but I already had the Mayflash adapter sitting there and I didn’t feel like waiting a week for other stuff to show up. I was already high from the success I’d had. I opened up the Mayflash adapter and looked at the controller port PCB. It is just a simple 4 port breakout board with the controller pins nicely broken out into a header with some ribbon wires connecting the controller port PCB to the main PCB with all the components on it. As luck had it, the four ports were actually broken out into two 8 pin headers on opposite sides of the long narrow controller port PCB. I scored it in the middle and snapped it in half, leaving the first two ports still intact and functional, and with a nice two port breakout PCB ready to recycle for my custom adapter.
The next issue was that there needs to be a pullup resistor between the single data line and the 3.3v pin. The libjoybus readme recommended a 750Ω resistor, but the only resistor I had laying around was 100KΩ. Way too much resistance! I scrounged around in my electronics bin for any random PCBs I had that might have something in the ballpark that could work. Fortunately, back in the Catskull Electronics days, I made a really stupid decision. The long story short is that I made my own ATmega328p “Arduino Nano” board but with USB-C. This was when USB-C was still pretty new, and there weren’t any commercially available Arduino boards with USB-C, so it seemed like a decent idea. The mistake was that in order to get the boards made for a price that could even be somewhat competitive, I had to order like 500 which was way way more than I typically ordered when testing out a new product. I figured worst case scenario I’d design some other product that could use them. They also needed the Arduino bootloader to be flashed which was really annoying to do. In the end I only sold like 5 of them and I still have a bag in my closet full of 495 of them, just sitting there. I actually remember one guy bought one and I didn’t ship it for a few days so he cancelled the order and was like “btw these are sold on Amazon now for 1/4 of the price, you moron” to which I couldn’t help but to agree. Well, as fate would have it, those boards have a built in LED on pin 13 as any proper Arduino clone should have, and it just so happens that we used a 1KΩ resistor on it! The problem was that the resistor is very small, either 0402 or 0603, which is at the limit of what is possible for me to hand solder with an iron. Due to the dual layer design of the RP2040-zero, reflowing it on wasn’t really an option. I decided to give it a shot anyways, and if worst came to worst I’d go to the thrift and buy a VCR or some other e-waste to salvage a resistor from, or possibly try to make my own resistor with some graphite lead or something. Getting it off the Arduino was easy thanks to my cute little Miniware MHP30 USB-C hot plate. I no longer have a nice soldering area, so I ripped apart a cardboard box, laid it on top of a pile of Dr. Pepper cans, plugged the hot plate in, set the Arduino on it to warm up, and then just picked it off with some tweezers. The resistor is so small that I almost lost it immediately. Seriously, those things are so small if you sneeze they’ll just vanish into thin air! If you know, you know.
One of the most useful tools I’ve purchased is a spool of wire wrapping wire. A single $10 spool is a lifetime supply. It’s a little thin for what I’d normally use, and single stranded wire has pretty bad mechanical strength. It will snap if you pull too hard. But stripping it is super easy, I just pinch with my fingernails and pull the end off, then trim to length with cutters. I’ve done it enough that it’s pretty easy for me now. I got all 4 wires connected on both ends pretty easily, so now it was time for the hard part. Luckily the RP2040-zero has a GPIO right next to the 3.3v pin, so I could just solder the resistor in between the two pads. Looking at the photo now, it almost looks like there might be surface mount pads for both pins as well, but I didn’t notice that at the time. The hard part doing this is keeping the wire from falling out while you heat up both sides and the resistor in place as the solder cools down. By some miracle, I was able to get it taken care of! It’s not my proudest work, that would go to hand reflowing a BGA64 chip with only hot air, but it’s up there.
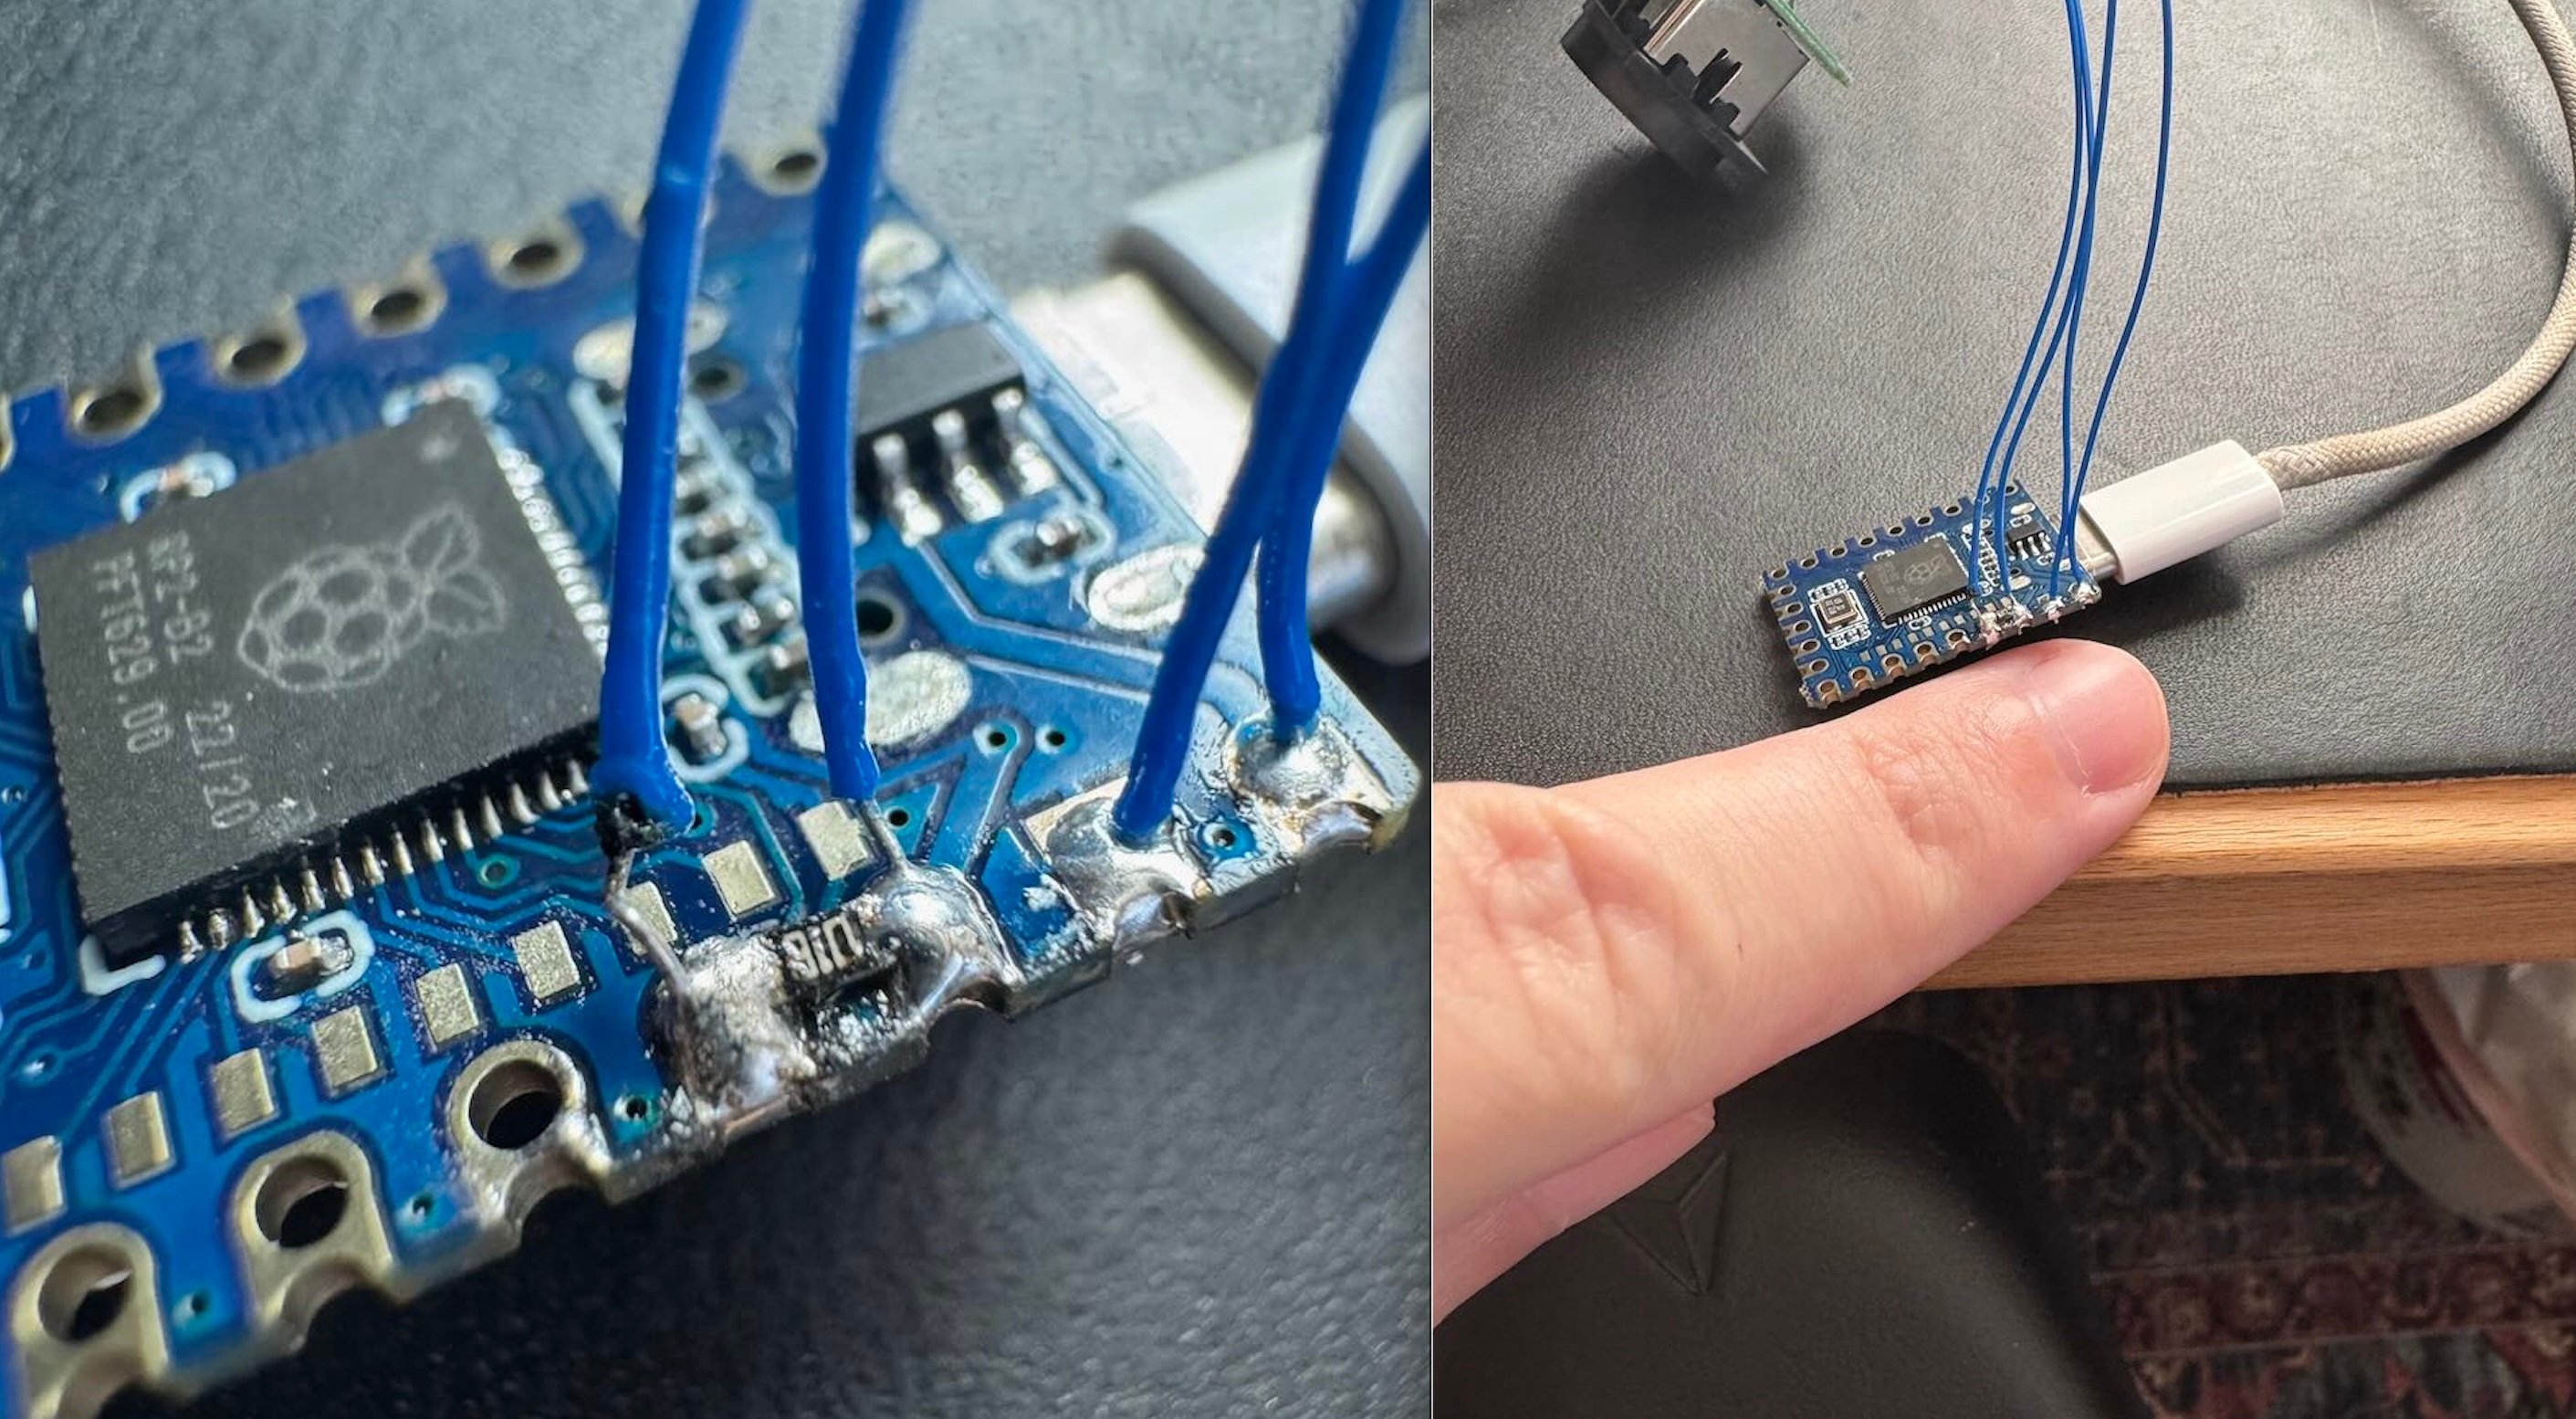
I plugged it in, flashed the code, plugged it in, and suddenly my computer recognized that a DualShock 4 was plugged in! Holy cow! However, none of the buttons worked. Was this the moment it would all fall apart? Like Icarus, had I flown too close to the sun, drunk on my own AI psychosis? The readme for the libjoybus example says to connect the data pin to “any” GPIO, which I took to mean the code would somehow scan for data on all the GPIO. What it actually meant was connect the data pin to GPIO 12, but that you could use any other GPIO as long as you updated the code. Since I was using the GPIO nearest the 3.3v pin, I updated the code to use that one, rebuilt and reflashed, and suddenly, it worked! Even vibration worked!
“No way, no absolute way…” It was too good to be true. Still skeptical, I booted up Dolphin, mapped the controller, and had a test. The only game I had backed up was Disney Extreme Skate Adventure. If you don’t know, it’s literally a reskin of Tony Hawk’s Pro Skater 4 but with Disney characters and levels. All the tricks are unique to the characters, so I laughed my butt off doing the most insane grinds with Woody as I felt the incredible rumble motor fully working. I would have thought there would have been some nuance or bug with some of the analog inputs, but as far as I can tell, there are none. It works perfectly. I’m not a professional smash player, so I’m not sure if there are some nuances I’m missing, but as far as I’ve been able to tell everything works perfectly.
To finish it off, I just wrapped the wires around the PCB and taped the RP2040-zero to it with some sweet silicone tape. It’s really stretchy and only sticks to itself, no adhesive to gum everything up. I’m half tempted to design a board to make it easier for others to build, or possibly even sell a premade adapter, but at this point I’m having too much fun just using it to bother. That’s one regret I have from Catskull Electronics. I was always so busy with literally everything else that I never really had any time to actually use any of the gear I was making.
The End
And that, folks, is the long tale of how I got a GameCube controller working on macOS. I am so thankful to the libjoybus project for allowing this to happen. It’s exciting and a bit scary that I was able to point Claude Code at the problem and it worked it out. I would have spent weeks trying to figure out all the random data needed to get the RP2040 to do DualShock 4 stuff, but Claude went through it like a hot knife through butter.
If you’re interested in building your own, I submitted a pull request to libjoybus with my firmware and instructions.
-
FTDI’s USB-serial chips became ubiquitous by 2014, thanks in no small part to the official Arduino boards using them. However, to save money, a lot of clone Arduino boards (which in itself wasn’t strictly illegal since Arduino was kind of open source) started using clone FTDI chips as well. In fact, to an end user, it wouldn’t even be totally clear if their device had a real or a clone FTDI chip in it. To combat this, FTDI pushed a driver update through Windows Update that would do a bit of additional handshaking to determine if the chip it was talking to was authentic or not. One of the features of the FTDI chips is that they have an internal EEPROM that can be flashed with a custom Product ID. This was useful to device manufacturers that wanted to have a custom driver to talk to their custom chip, or have it show up in Windows as something other than an FTDI USB-serial chip. The updated driver would set the Product ID to something other than the default if it detected it was counterfeit, which resulted in the chip being bricked. It actually wasn’t fully bricked, but it couldn’t be used with the official FTDI driver. On principle it doesn’t actually feel that wrong to me since cloners were illegally profiting off of FTDI’s name and software. The problem is that the only people who suffered the consequences were end users. One day their device worked fine, then Windows updated the driver, and suddenly it stopped working with no clear explanation or warning about why. This caused the cloners to simply stop pretending to be FTDI chips and use their own Vendor and Product ID with their own driver. Today, FTDI USB-serial chips are no longer common in cheap hardware, instead using the new Chinese chips such as the WCH ch34* series which are cheap and excellent but lack some of the advanced features of the FTDI chips such as the programmable EEPROM. In fact, as an intern, I had a project where I was writing software to support a new development board that had a nice 4-port FTDI USB-serial chip on it. It was essentially 4 USB-serial chips in a single package with a built in USB hub. One of the ports was used for serial communication, and the other three were used to drive GPIO of a microcontroller on the development board. Part of my project involved writing a serial number into the FTDI chip’s EEPROM for company inventory tracking. I’m sure it never really mattered but it was a lot of fun to build out and in hindsight, I’m very proud of the job I did on it. I think I was more impressive to some of my coworkers than I gave myself credit for! ↩